Sound is just as important as the visuals. Every location is another character in your project. Thorough preproduction with location scouts and the sound department can help address (or avoid) sound issues before investing time and money.
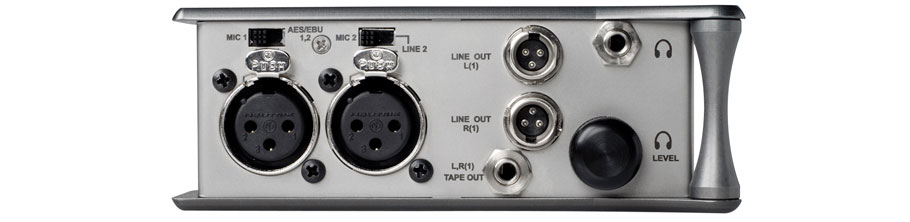
Sound Devices 302 Mixer
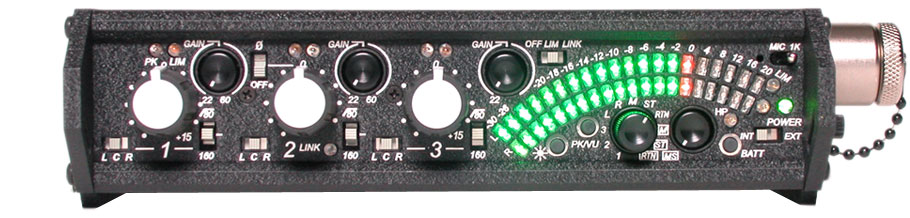
302 front panel

302 left panel
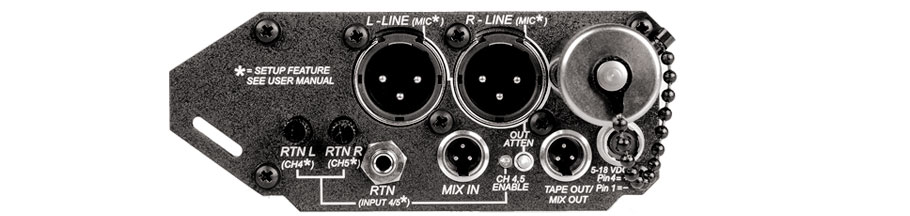
302 right panel
- Mixer white knobs control all three channels, but this is only for overall balance of elements
- Mics require preamps (depressed Gain knobs) to set correct level
- LCR switches (front panel) set panning for each channel
- Hi-pass filter on each channel:
- 80Hz is good for voices (doesn’t encroach on necessary frequencies)
- 160Hz is a bit high, but may be necessary on windy days or in boomy rooms
- Filter should be ON if you are recording dialogue and/or need to get rid of extreme low end or boomy-ness. Otherwise, don’t use it—you don’t necessarily know how the filtered sound will interact with other elements.
- Line level audio outputs send signal to recorder
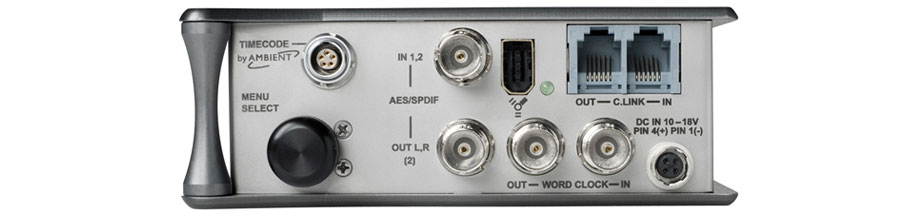
Sound Devices 702T Recorder
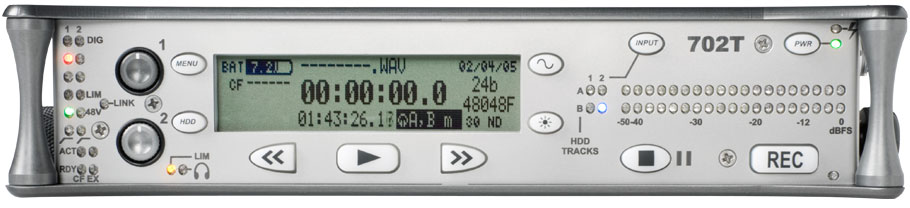
702T front panel
702T back panel
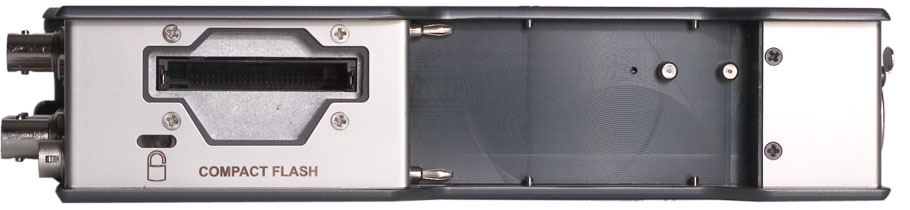
702T left panel
702T right panel
- 702T has 2-channels (but their preamps aren’t necessary—you will use the 302 Mixer preamps)
- Left panel inputs should be switched to line level (line level signal arrives at the 702T from the 302 Mixer)
- “T” stands for timecode: this device generates timecode for sync with video
- Single Process Sound: mic plugged directly into camera
- Dual Process Sound: use a separate audio package to record with timecode (all of this gear makes dual process possible)
- 4GB Flash (CF card) should be sufficient for a day of work at 48kHz/24-bit
702T Overview by AbelCine
Jake Belser's Overview of the 302 Mixer and 702T Recorder
Denecke Dcode SB-3 Sync Box

All options to configure the SB-3 are inside the rear panel.
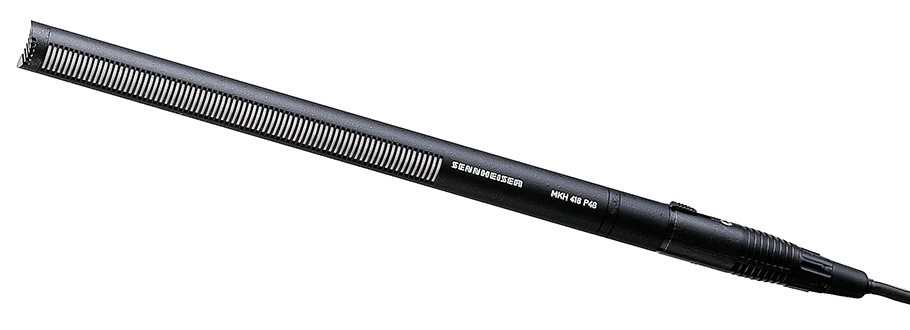
Sennheiser MKH 416 Shotgun Mic
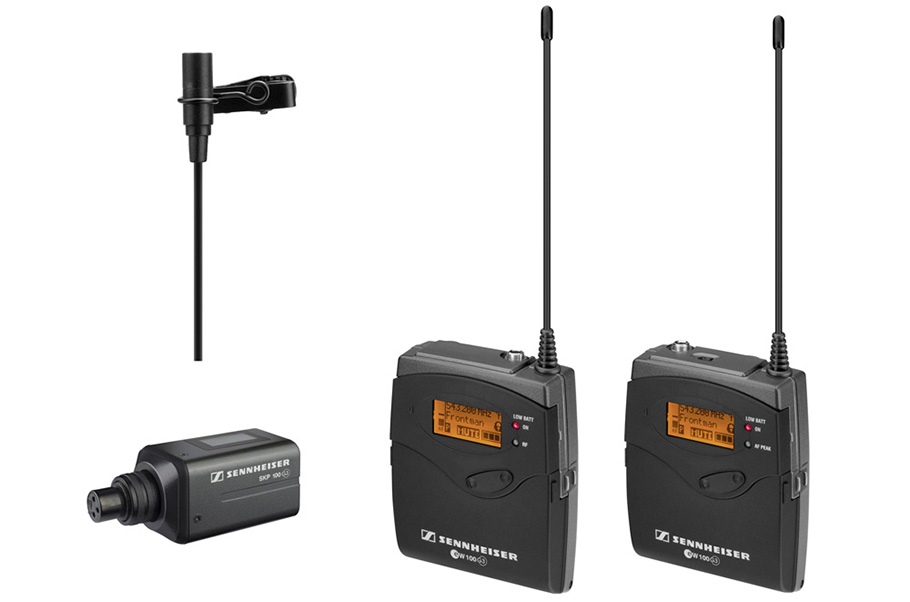
Sennheiser ew 100 G3 Wireless System
702T Menu Navigation Basics see 702-T manual page 5
The Setup Menu provides options for recording, routing, and control. The single layer menu structure allows for very quick navigation and function selection. To enter the Setup Menu press the front panel Menu button. Once in the Setup Menu, the following conventions are shared for navigating among selections and to select specific parameters.
- Menu button enters Setup Menu
>ITEM<angle brackets signify a highlighted menu item- selects highlighted item or parameter
- moves up in menu and between menu parameters
- moves down in menu and between menu parameters
- exits the selected function or Setup Menu altogether
- Stop button will exit from any menu and cancel any changes. Use it to escape out of the Setup Menu.
The right panel Rotary Switch (labeled “Select”) is a convenient control to quickly navigate among menu items and item options. Its push-to-select function duplicates the check mark in most menus.
702T Menu Options
- Record Sample Rate
- 48 kHz (ALWAYS for video)
- Record Bit Depth
- 24-bit
- Record File Type
- WAV Poly (2-channel WAV file)
- Record Media Select
- CF Card (also possible to plug in FW drive for redundant recording backup)
- Record Scene Name/Number
- Can do on this device, but easier to do on paper. BE SURE TO TAKE NOTES while recording because you WILL forget once the shoot is over.
- Record Take Name & Number
- Optional
- Reset Take Names
- Allows you to start re-numbering at the start of a new day.
- Input Routing
- Leave as default (channel 1 to LEFT; channel 2 to RIGHT) 1>A; 2>B
- Phantom Power
- OFF (mixer handles this)
- Limiter
- OFF (kills dynamic range of actor’s performance)
- Gain Range
- Not really needed unless your mic is VERY sensitive or unresponsive.
- Timecode Framerate
- 23.976 for HD video
- Timecode Mode
- Set to Free Run. In most cases students will use the 702T as a master timecode generator.
In SOME cases, the 702T will run in slave mode, set to Free Run Jam Once or Record Run. This is an exception. - Timecode Jam
- Choose Jam Zeroes to reset the timecode. Choose Edit Value and set at Hour 1 for ease of collaboration with editors.
- Timecode Display Mode
- Can tweak how/where the timecode appears on the screen.
- Time/Date Mode
- Set to 12 or 24 hour clock; set the date.
Timecode with the Denecke Dcode SB-3 Sync Box
How to set up Jam Sync with the 702T.
- Open the back panel
- Press the white plastic button to turn it on.
- Set clock to 48K (dip switches set to 01)
- Rotate TC RATE with screwdriver to position #4 for 23.976 fps.
- After settings are done, the light on the Denecke device flashes rapidly (it’s looking for timecode).
- Connect 702T (should be sending 23.976 fps) to Denecke JAM IN with the Lemo cable (5-pin to 3.5 mm headphone plug).
- You will see the Denecke’s light flash consistently which means it’s now synced to the 702T and can lock in the camera’s timecode.
- Use the short BNC cable to connect Denecke to camera: Denecke TC Out to Timecode jack on camera (NOT Gen Lock).
- Use camera menu (looks like 000 above wrench icon) to set Timecode IN: Mode > Preset > Free Run
You can test the timecode sync by framing a shot of the 702T screen. Compare the numbers on the camera screen with those on the 702T.
Press the white plastic button to turn the Denecke box OFF when shoot is done.
Remember to use slates as a backup if these timecode operations fail.
Balance & Set Levels with the 302 Mixer and 702T Recorder
Balancing Levels
- On the 302 mixer, flip the tone generator switch, This sends a 1KHz tone at 0 VU.
- Use the depressed Input Level knobs on the 702T so that this signal reads on the recorder (702T) at -20dB.
- If you’re going to record with the shotgun mic, set phantom power ON. For the wireless mics, phantom power OFF.
Setting Levels
- White knob of the mixer should be at 0.
- Use the depressed Gain knob of the mixer channel to set levels for each channel so that the mixer meter is hitting 0 VU (which should correspond to -20dB on the digital recorder).
- Once you have set these base levels, use the white knob to raise or lower individual channels as needed.
- Monitoring with headphones: Recordist MUST monitor from recorder; boom operator can monitor from mixer.
Mic & Boom Techniques
Boom Pole Best Practices
- Keep mic out of the frame! Keep eyes on the camera screen to see where the mic is at. In a handheld shot this is difficult so you have to be especially careful. If the camera is on a tripod you can use a frame line and orient that with a visual marker in the room.
- Get as close as you can; point mic at the top of the actor's mouth.
- Use rehearsal time to find the best recording location on the set.
- Be aware of shadows and avoid these at all cost.
- Be invisible! Do what you need to do with little to no interference of others so that the entire shoot can move forward smoothly.
- Know the dialogue so that you can reposition the mic and have it oriented towards the actor who is speaking.
- Don't boom from underneath—always go above!
- If you have to ADR, use the same mic to insure consistency.
- It's useful to have a lav on each of your actors so you can combine all signals. If you plan to use a wireless, plan wardrobe accordingly so that the mic can be effectively hidden.
Boom Pole Handling Noise?
- Wear lightweight gloves. These make a tremendous difference and allow you to re-grip the pole with little to no handling noise.
- Make the cable routing and connections as flexible as possible so that equipment can move freely. If you have to force or stretch your equipment you will introduce noise.
Wireless & Lavaliere Best Practices
- Use the sensitivity adjustment on the transmitter to set initial levels.
- Plug the receiver unit into a channel of the mixer. Consider splitting boom mic to the left channel and lav(s) to the right for independent control.
- Use 302 mixer Gain knob to set levels (try for ~0 VU).
Phase Problems?
Phase cancellation will leave the audio sounding thin, bright, nasal and quiet. Otherwise...bad!
- Phase Demystified
- With two lavs you can have problems with phasing if both mics are sent to same channel. Split the lavs to left and and right channels to minimize problems.
- Additional phase problems? There is a phase invert switch on each mixer channel that may help. It looks like a 0 with a slash through it. Turn this on and listen for an improvement (ideally a fuller, richer, deeper sound).
- The boom mic may contribute to phase problems as well. Try re-positioning to find the best arrangement. Realize that there is no "magic solution" when battling phase issues. Every variable of your shoot plays a part. Think creatively and pragmatically to find suitable workarounds and solutions.
Tod Maitland Field Audio Interview
Tod A. Maitland has been nominated for three Academy Awards in the category Best Sound. He has worked on more than 80 films since 1978 (Wikipedia; IMDB)
Location Scouting
When you go to check out a spot for a shoot—LISTEN!! And LOOK!!
What makes sounds in the environment? Are any of these unwanted or potentially problematic? Can you incorporate these elements into the scene? If so, then the noise is OK. If you can't show the noise sources (don't fit the scene, sound sources are hidden, etc.) then you have to get creative and find a way to deal with them:
- mask with blankets, pillow, carpet, foam, etc.
- add a sound into the scene that covers the noise or makes it less present in the mix
If you can't find a way to manage the noise (it is prohibitively bad and you can't justify the additional sound in some way), you have to talk to the director. They have to know that the shot must be looped (ADR) or the noise-making thing must be added into the scene.
On-Set Preparations
During blocking rehearsals, watch the actors
- How loud are they speaking?
- Which way are they turning?
- Are they moving or stationary?
- If stationary, can you hide a mic?
- Are clothes going on or off?
- What are their height differences? Will this determine shot composition?
All of these factors will determine what can be done with regard to mic placement, aka THE KEY to good sound.
Miking Techniques
Sound is the first thing that separates amateur and professional film. When the mic is 3' away from an actor and all you hear is room tone, the film sounds amateurish.
Use a boom if you can. This gets the best sound if within 12-18" of an actor.
Wide shots demand wireless mics. With wireless lavs, the sound will not always be as consistent due to head movement. This is OK if the scene is relatively still, but will be problematic if actors are moving a lot. The sound from a lav is not as full and rich, but it can work well when a boom is unfeasible.
Place the mic where you can imagine the point of a v-neck sweater. The middle of the actor's chest is the ideal place for it to go, but costume constraints may not allow this.
As with most situations, you have to balance "the ideal" with the limitations of your particular circumstances.
A good boom operator will make all the difference. They look at the framed shot in the camera to check their position. The mic should be 1" above the frame line and move with the actor.
The boom operator must wear headphones and stay on top of the actor as they move through the scene. If that doesn't work, you can use wireless, but it should not be used exclusively. Be sure there is another mic in the room to get the indirect sound of actor voices in the space of the scene.
Hear some additional thoughts from Tod on boom technique and wireless placement.
Consider bringing carpet samples to the shoot to help contain "rogue sounds" and bounciness or "liveness" on the set.
Equalization (EQ) During Production
As an audio engineer on set, get the voice of the actor in your head. Know what this person sounds like so that when the acoustic situation on the set is bad you can make adjustments that allow them to sound "right" (like themselves). You don't want to add anything, you just want to be sure that regardless of the conditions their voices sound natural.
For instance, with wireless mics, the hi-end can get lost due to the mic being hidden under clothing. Add some high frequencies in the EQ to compensate for this. If this isn't possible in the field, you can do it in post as well. If in doubt, it's better for things to be too bright than too dark. With brightness (of timbre) comes clarity. Add some high and high-mid frequencies; perhaps roll off (reduce) the lows. It's easier to reduce high frequencies than to add them in afterwards.
Room Tone
Be sure to record the room (or other shooting location) with nothing happening for at least 30 seconds. This sample of ambience can be used to fill gaps or help "dirty up" takes in which the audio sounds unnatural or is disrupted by clothing noise, etc.
Similarly, when you're on the set, take advantage of the location and props and record the sounds you know will be needed for the movie. This can be difficult given the inevitable interruption of other things in the environment, so you have to do this frequently and strive to get a clean, close perspective that will be usable later on.
A portable Zoom recorder is great for this because you can quickly steal away and get these sounds without disrupting your work flow.
Overlapping Dialogue Why it's important to avoid overlaps in your coverage
Overlaps can introduce indirectly-recorded audio that is difficult if not impossible to remove.
Try to keep the audio of your close-ups clean. If it's not on camera, it should not overlap with the audio that is in the shot. This is difficult given the need for actors to be spontaneous while shooting. In these cases, use a second boom so that you can get good, clean audio with solid levels on the other person in the shot (over-the-shoulder person, for example). This gives the editors more options so that they have clean audio in those cases where they have to use a take with overlaps. This is also important in those situations where actors are ad-libbing. If you don't have the entirety of the dialogue (due to improvised differences on each take) the editors will not be able to construct a coherent sequence.
A wireless mic is one way to record in these situations because you can just clip it on the actor's shirt—you don't need to worry about hiding it because their back is often to the camera.
Looping & ADR On a Budget
Make notes as to which mic you used so that you can re-record with consistency. A different mic will introduce a different timbre and the dialogue will sound mismatched. Use the same mic and replicate the distance of the original recording.
"Poor Man's ADR" by Robby Benson
Record three passes with each actor on all of their dialogue. Make these recordings as clean as can be so that you can use them later if needed. Do this before or after recording room tone. Acoustically, the sound will match the space. Plus, all cast members are there so you don't have to schedule ADR sessions after the fact (saving time and money).
Other Resources
- JWSoundGroup All-around excellent resource for audio people working in the business
- Sound on Sound Online version of "the world's largest recording technology magazine"
- Walla Track Script Healthy, delicious gibberish for fabricating crowd dialogue
Acknowledgements
I could not have made this resouce without the help of these lovely people:
- Connor Andrei
- Jake Belser
- Robby Benson
- Tod Maitland
- Russell McGee
- Josh Sites
- John Walsh